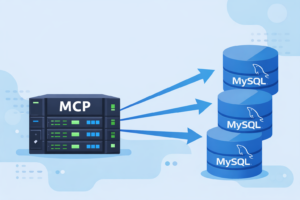
“Ripple”とは
Rippleは、Googleの Pavel Ivanov 氏が開発したMySQLレプリケーションの中継を行う中間サーバです。Apache-2.0ライセンスで公開されています。
Ripple は通常のレプリケーションスレーブと同様に、マスタに接続してバイナリログを読み取ります。ただし、テーブルデータは保持しないためバイナリログのイベントは実行せず、バイナリログをダウンロードしてローカル上に保存だけ行います。
スレーブは Ripple が保持するバイナリログを読み取ってレプリケーションを実行できます。つまり、「マスタ → Ripple → スレーブ」というトポロジーが可能となります。なお、今のところはGTIDレプリケーション限定のようです。
※ MySQLだけでなくMariaDBにも対応しているようです
※ ちなみに”Ripple”は日本語で「さざ波」という意味です
Rippleの用途
Ripple のユースケースとして考えられるのは以下の通りです。
+ 既存のマスタ/スレーブの中継
上記の通り、Ripple は既存のマスタ~スレーブのレプリケーションの間に入って通信を中継できます。
この時、マスタではバイナリログの読込および転送が不要となるため、負荷軽減が期待できます。
※ Blackholeストレージエンジンと似たような役割です
+ バイナリログのバックアップ(Binlog Server)
バイナリログはレプリケーションだけでなく、PITR(ポイント・イン・タイム・リカバリ)でも使用されるなど、かなり重要度の高いファイルです。そのため、ディスクの物理障害などでバイナリログファイル自体の参照ができなくなった場合、かなり困難な局面となってしまいます。
そこで、Ripple を活用して別サーバにバイナリログのバックアップを用意しておけば、最悪の事態を回避することができます。
検証
百聞は一見に如かず、ということでRippleを実際に使ってみました。
今回は以下のような検証環境を用意しました。サーバスペックは全て共通(2 vCPU, 4G MEM)にしています。
| ホスト名 | IPアドレス | OS | 用途 |
|---|---|---|---|
| master | 192.168.30.10 | CentOS 7.4 | MySQLマスタ |
| slave1 | 192.168.30.20 | CentOS 7.4 | MySQLスレーブ |
| slave2 | 192.168.30.30 | CentOS 7.4 | MySQLスレーブ2 |
| middle | 192.168.30.40 | Ubuntu 18.10 | Ripple |
1. MySQL(マスタ)のインストール
まずは、master に MySQL8.0 をインストールします。
|
1 2 3 |
[vagrant@master ~]$ sudo setenforce 0 [vagrant@master ~]$ sudo rpm -ivh https://dev.mysql.com/get/mysql80-community-release-el7-2.noarch.rpm [vagrant@master ~]$ sudo yum install -y mysql-server |
バイナリログとGTIDを有効にした状態でMySQLを起動します。
|
1 2 3 4 5 6 7 8 9 10 11 12 13 14 15 16 17 18 19 20 21 22 23 |
[vagrant@master ~]$ sudo vi /etc/my.cnf ※以下を記載 [mysqld] server_id = 10 ### slave1は 20 / slave2 は 30 log_bin log_slave_updates gtid_mode=ON enforce-gtid-consistency binlog-format = ROW log_error = /var/log/mysqld.log default_authentication_plugin= mysql_native_password ※ Rippleは libmariadbclient を使ってビルドするため、"default_authentication_plugin= caching_sha2_password"に対応していない [vagrant@master ~]$ sudo systemctl start mysqld [vagrant@master ~]$ sudo cat /var/log/mysqld.log | grep temp 2019-03-18T06:55:48.254744Z 5 [Note] [MY-010454] [Server] A temporary password is generated for root@localhost: _)z<uhcg+3_I [vagrant@master ~]$ mysql -u root -p mysql> ALTER USER 'root'@'localhost' IDENTIFIED BY 'MySQL8.0'; mysql> CREATE USER `repl_user`@`192.168.30.%` IDENTIFIED BY "Repl_pass1"; mysql> GRANT REPLICATION SLAVE ON *.* TO `repl_user`@`192.168.30.%`; |
2. MySQL(スレーブ)のインストール
次にslave1/slave2 に MySQL8.0 をインストールします。
|
1 2 3 |
[vagrant@slave1 ~]$ sudo setenforce 0 [vagrant@slave1 ~]$ sudo rpm -ivh https://dev.mysql.com/get/mysql80-community-release-el7-2.noarch.rpm [vagrant@slave1 ~]$ sudo yum install -y mysql-server |
バイナリログとGTIDを有効にした状態でMySQLを起動します。
|
1 2 3 4 5 6 7 8 9 10 11 12 13 14 15 16 17 18 |
[vagrant@slave1 ~]$ sudo vi /etc/my.cnf ※以下を記載 [mysqld] server_id = 10 ### slave1は 20 / slave2 は 30 log_bin log_slave_updates gtid_mode=ON enforce-gtid-consistency binlog-format = ROW log_error = /var/log/mysqld.log default_authentication_plugin= mysql_native_password [vagrant@slave1 ~]$ sudo systemctl start mysqld [vagrant@slave1 ~]$ sudo cat /var/log/mysqld.log | grep temp 2019-03-18T06:55:48.254744Z 5 [Note] [MY-010454] [Server] A temporary password is generated for root@localhost: _)z<uhcg+3_I [vagrant@slave1 ~]$ mysql -u root -p mysql> ALTER USER 'root'@'localhost' IDENTIFIED BY 'MySQL8.0'; |
3. Rippleのインストール
middle サーバに Ripple をセットアップします。インストール手順はGitHubのページに載っていますが、Ubuntu 18.10を想定したコマンドになっています。そのため、同サーバのみ Ubuntu 18.10 で試します。
※ 試しにCentOS7.4環境でビルドしようとしましたが、上手くいきませんでした
※ gitコマンドのバージョンが 1.8.5 以降でないとビルド時にエラーが発生します
|
1 2 3 4 5 6 7 8 9 10 11 12 13 |
vagrant@middle:~$ sudo /etc/init.d/apparmor stop vagrant@middle:~$ sudo apt-get update && sudo apt-get install pkg-config zip g++ zlib1g-dev unzip python libssl-dev default-jdk-headless libmariadbclient-dev vagrant@middle:~$ echo "deb [arch=amd64] http://storage.googleapis.com/bazel-apt stable jdk1.8" | sudo tee /etc/apt/sources.list.d/bazel.list vagrant@middle:~$ curl https://bazel.build/bazel-release.pub.gpg | sudo apt-key add - vagrant@middle:~$ sudo apt-get update && sudo apt-get install bazel vagrant@middle:~$ git clone https://github.com/google/mysql-ripple.git vagrant@middle:~$ cd mysql-ripple vagrant@middle:~/mysql-ripple$ bazel build :all vagrant@middle:~/mysql-ripple$ bazel test :all vagrant@middle:~/mysql-ripple$ ls -l ./bazel-bin/rippled -r-xr-xr-x 1 vagrant vagrant 6502416 Mar 19 01:57 ./bazel-bin/rippled |
4. MySQL-clientのインストール
Rippleがマスタに接続するために、MySQL-clientを使用します。そのため、middleサーバにMySQL8.0の client のみインストールします。
|
1 2 3 4 5 6 7 8 9 10 11 12 13 14 15 16 |
vagrant@middle:~$ ### sudo apt-get remove libmariadbclient-dev libmariadbclient18:amd64 vagrant@middle:~$ wget https://dev.mysql.com/get/Downloads/MySQL-8.0/mysql-community-client_8.0.15-1ubuntu18.10_amd64.deb vagrant@middle:~$ wget https://dev.mysql.com/get/Downloads/MySQL-8.0/mysql-community-client-core_8.0.15-1ubuntu18.10_amd64.deb vagrant@middle:~$ wget https://dev.mysql.com/get/Downloads/MySQL-8.0/mysql-common_8.0.15-1ubuntu18.10_amd64.deb vagrant@middle:~$ sudo apt-get install ./mysql-*.deb vagrant@middle:~$ mysql --version mysql Ver 8.0.15 for Linux on x86_64 (MySQL Community Server - GPL) vagrant@middle:~$ mysql -u repl_user -pRepl_pass1 -h 192.168.30.10 -e "select @@hostname" mysql: [Warning] Using a password on the command line interface can be insecure. +------------+ | @@hostname | +------------+ | master | +------------+ |
5. Rippleのセットアップ
早速、Rippleを起動してみましょう。主要なオプションは以下の通りで、基本的にはCHANGE MASTERコマンドを実行する時と同様です。
| オプション | 説明 |
|---|---|
| -ripple_datadir | Rippleがバイナリログを保存するディレクトリのパス |
| -ripple_master_address | マスタのIPアドレス |
| -ripple_master_user | レプリケーションユーザのユーザ名 |
| -ripple_master_password | レプリケーションユーザのパスワード |
| -ripple_master_port | Rippleがマスタに接続する時に使用するポート(マスタのmysqldが稼働するポート) |
| -ripple_server_ports | Ripple自体が稼働するポート(スレーブが参照するポート) |
| -ripple_server_address | bindするアドレス。デフォルトは”localhost”なので、外部からの接続を受け付けない |
| -ripple_purge_expire_logs_days | バイナリログの保持期間(expire_logs_days変数と同じ) |
| -ripple_max_binlog_size | Rippleが保持するバイナリログの最大サイズ(max_binlog_size変数と同じ) |
| -ripple_semi_sync_slave_enabled | 準同期レプリケーションを利用している場合は”true”にする |
|
1 2 3 4 5 6 7 8 9 10 11 12 13 14 15 16 17 18 19 20 21 |
vagrant@middle:~/mysql-ripple$ mkdir /home/vagrant/binlog_stored/ vagrant@middle:~/mysql-ripple$ ./bazel-bin/rippled -ripple_datadir=/home/vagrant/binlog_stored/ -ripple_master_address=192.168.30.10 -ripple_master_port=3306 -ripple_master_user=repl_user -ripple_master_password=Repl_pass1 -ripple_server_ports=15000 -ripple_server_address=0.0.0.0 WARNING: Logging before InitGoogleLogging() is written to STDERR I0319 19:30:01.936671 24731 rippled.cc:48] InitPlugins I0319 19:30:01.936851 24731 rippled.cc:60] Setup I0319 19:30:01.936900 24731 binlog.cc:307] Starting binlog recovery I0319 19:30:01.936982 24731 rippled.cc:102] No binlog found, creating new I0319 19:30:01.944442 24731 mysql_server_port_tcpip.cc:150] Listen on host: localhost, port: 15000 I0319 19:30:01.944552 24731 rippled.cc:62] Start I0319 19:30:01.945144 24733 mysql_master_session.cc:181] Master session starting I0319 19:30:01.948606 24733 mysql_client_connection.cc:148] connected to host: 192.168.30.10, port: 3306 I0319 19:30:01.965399 24733 mysql_master_session.cc:137] Connected to host: 192.168.30.10, port: 3306, server_id: 10, server_name: W0319 19:30:01.969043 24733 mysql_master_session.cc:197] master does not support semi sync I0319 19:30:01.969435 24733 mysql_master_session.cc:206] start replicating from '' I0319 19:30:01.970785 24733 mysql_master_session.cc:229] Master session entering main loop I0319 19:30:01.972209 24733 binlog.cc:626] Update binlog position to end_pos: binlog.000000:467, gtid: 0-0-0 I0319 19:30:01.972554 24733 binlog.cc:616] Skip writing event [ Previous_gtids len = 27 ] I0319 19:30:01.972854 24733 binlog.cc:626] Update binlog position to end_pos: binlog.000000:467, gtid: 0-0-0 I0319 19:30:01.973287 24733 binlog.cc:626] Update binlog position to end_pos: binlog.000000:789, gtid: 0-0-1 I0319 19:30:01.973700 24733 binlog.cc:626] Update binlog position to end_pos: binlog.000000:1120, gtid: 0-0-2 I0319 19:30:01.974069 24733 binlog.cc:626] Update binlog position to end_pos: binlog.000000:1388, gtid: 0-0-3 |
これでRippleが正しく起動できました。
6. スレーブの接続
MySQLスレーブをRippleに接続して、レプリケーションを構築してみます。
|
1 2 3 4 5 6 7 8 9 10 11 12 13 14 15 16 17 18 19 20 21 22 23 24 25 26 27 28 |
[vagrant@slave1 ~]$ mysql -u root -pMySQL8.0 mysql> CHANGE MASTER TO MASTER_HOST="192.168.30.40", MASTER_PORT=15000, MASTER_AUTO_POSITION=1; mysql> START SLAVE USER="repl_user" PASSWORD="Repl_pass1"; mysql> SHOW SLAVE STATUS\G *************************** 1. row *************************** Slave_IO_State: Waiting for master to send event Master_Host: 192.168.30.40 Master_User: repl_user Master_Port: 15000 Connect_Retry: 60 Master_Log_File: binlog.000000 Read_Master_Log_Pos: 945 Relay_Log_File: slave1-relay-bin.000002 Relay_Log_Pos: 1144 Relay_Master_Log_File: binlog.000000 Slave_IO_Running: Yes Slave_SQL_Running: Yes ... Slave_SQL_Running_State: Slave has read all relay log; waiting for more updates ... Retrieved_Gtid_Set: c1931792-4ab5-11e9-8586-525400aeb52b:1-3 Executed_Gtid_Set: c1931792-4ab5-11e9-8586-525400aeb52b:1-3 Auto_Position: 1 ... 1 row in set (0.00 sec) |
ベンチマーク
この状態で、sysbenchを使った簡単なベンチマークを実施してみます。
masterサーバのローカル上で実行しましょう。
|
1 2 3 4 5 6 7 8 9 10 11 |
[vagrant@master ~]$ curl -s https://packagecloud.io/install/repositories/akopytov/sysbench/script.rpm.sh | sudo bash [vagrant@master ~]$ sudo yum -y install sysbench [vagrant@master ~]$ mysql -u root -pMySQL8.0 -e "CREATE DATABASE sbtest1" [vagrant@master ~]$ time sysbench --db-driver=mysql --mysql-user=root --mysql-password=MySQL8.0 --mysql-db=sbtest1 oltp_write_only --tables=20 --table-size=100000 prepare ... real 1m20.636s user 0m5.897s sys 0m0.164s [vagrant@master ~]$ sysbench --db-driver=mysql --mysql-user=root --mysql-password=MySQL8.0 --mysql-db=sbtest1 oltp_write_only --tables=20 --table-size=100000 --time=600 run > ./ripple_slave_sysbench.log |
次に、slave1のレプリケーションとRippleを停止して、slave2から通常のレプリケーションを設定します。
|
1 2 3 4 5 6 7 8 9 10 11 12 |
[vagrant@slave1 ~]$ mysql -u root -pMySQL8.0 mysql< STOP SLAVE; mysql< RESET SLAVE ALL; ### middleサーバで稼働していたRippleを停止させる [vagrant@slave2 ~]$ mysql -u root -pMySQL8.0 mysql> CHANGE MASTER TO MASTER_HOST="192.168.30.10", MASTER_PORT=3306, MASTER_AUTO_POSITION=1; mysql> START SLAVE USER="repl_user" PASSWORD="Repl_pass1"; → その前に実行したsysbenchのイベントが一斉に流れてくるため、少し時間をあける |
その後、全く同じベンチマークを実行します。
|
1 2 3 4 5 6 7 8 9 |
[vagrant@master ~]$ mysql -u root -pMySQL8.0 -e "DROP DATABASE sbtest1" [vagrant@master ~]$ mysql -u root -pMySQL8.0 -e "CREATE DATABASE sbtest2" [vagrant@master ~]$ time sysbench --db-driver=mysql --mysql-user=root --mysql-password=MySQL8.0 --mysql-db=sbtest2 oltp_write_only --tables=20 --table-size=100000 prepare ... real 1m15.902s user 0m5.899s sys 0m0.166s [vagrant@master ~]$ sysbench --db-driver=mysql --mysql-user=root --mysql-password=MySQL8.0 --mysql-db=sbtest2 oltp_write_only --tables=20 --table-size=100000 --time=600 run > ./standard_slave_sysbench.log |
ベンチマーク結果を比べてみます。
|
1 2 3 4 5 6 7 |
[vagrant@master ~]$ diff ./ripple_slave_sysbench.log ./standard_slave_sysbench.log ... < transactions: 135771 (226.28 per sec.) < queries: 814626 (1357.69 per sec.) --- > transactions: 170193 (283.65 per sec.) > queries: 1021158 (1701.92 per sec.) |
Rippleを利用した方がバイナリログに関連する負荷が下がるためsysbenchのスコアは上がると予想していましたが、結果的には逆にスコアが下がってしまいました。
まとめ
個人的な感想としては、レプリケーションを中継する役割よりもバイナリログをバックアップする使い方の方が便利そうです。特にサーバ台数が多い大規模環境などでは、バイナリログを救出できないディスク障害などが発生する可能性も高まるため、いざという時の安全策として重宝するでしょう。
Rippleは、実際のGoogleの環境(Borgなど)でも一部使われているようなので、今後の機能追加や改善などにも期待したいですね。
参考
Rippleの公式ページ
MySQL Ripple: The First Impression of a MySQL Binlog Server


